Station Creation Series | How to Create a Sundae Station
How-To & Culinary
Created | 2018.07.23
Updated | 2021.07.26
If you’ve ever struggled creating a topping station, we don’t blame you. Finding the perfect configuration can be a tough task – but we’re here to help! Follow along with our Sundae Station Guide to see just how easy it is!
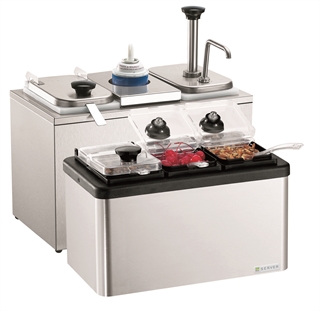
If you’re like most restaurant owners, your kitchen space is limited. This station uses a tiered approach to keep horizontal space to a minimum with ample space remaining for dessert assembly. This six topping station needs just 15 inches of counter width!
Everyone knows a good sundae comes complete with hot fudge or hot caramel – or both – but what about all the extra goodies? In this tiered station, keep whipped topping, pumpable butterscotch sauce and scoopable strawberry sauce cool in the top tier, and hold cherries, nuts and sprinkles in the bottom tier.
Now that you know your ingredients…
Step 1: Choose your Base

Free Pass! The lower tier is quite common and can be ordered as a complete unit; the MB-3 87290 station includes (3) deep 1/9-size jars in black, clear plastic hinged lids and ½ oz clear plastic spoons! There will be plenty of clearance above the lid to fit your serving dish below the pump. Our universal ice packs (100515) are sold separatey (See sheet 02108 for details).
The upper tier will keep a can of whipped topping and two ingredients cool using a combination of fountain jars and a Whipped Topping Can Cooler Kit. So you’ll need a base that holds (3) fountain jars: select the countertop, insulated SB-3 83760 base.
Step 2. Select your jars
As shown in the diagram, the SB-3 base holds 3 standard fountain jars – in this case, we’ll need two deep jars for the pumpable sauce and the ladled strawberry sauce. Deep jars hold 3 1/2 qt, or about (112) 1 oz servings. Keep a few jars stocked in a cooler for fresher toppings and quicker changeouts.
To keep your whipped topping can cool, Server offers a gel-filled, re-freezable Whipped Topping Can Cooler Kit (82847) with a specialized insert and lid to hold the can upright and keep the tip from touching the bottom of the jar when stored upside down.
Fun fact: A spare Can Cooler Kit with a black jar (82846) makes the switch-out schedule for day and night shifts pretty clear.
Step 3. Select pump, lid and ladle
When selecting a pump, the first thing to look at is base type. These are split between countertop and drop-in. For this station, the base type is countertop. Second, note the jar the pump needs to fit: this ensures you get the proper cylinder length to reach the bottom of the jar. For this station, it's a deep fountain jar. Third, use the “Dispenses” key to determine the viscosity of your food. Ice cream syrups generally fall under “Thin,” so you’ll end up with an FP-V (82120) pump.
For the strawberry or raspberry sauce jar, select the 10 inch fountain jar ladle (82561) and stainless steel hinged lid (82545), which attaches to the jar and stays open for easier handling while you scoop. Lastly, keep contents cold with a few ice packs (100515); use two and freeze two, so (4) ice packs will aid timely changeouts.

To build the Sundae Funday Station, you will need the following components:
(1) 87290 | MB-3 Mini Cold Ladle Combo
(2) 94013 | Round Eutectic Ice Packs
(1) 83760 | SB-3 Countertop Insulated Base
(2) 82557 | Standard, deep jars, white
(1) 82847 | Topping Can Cooler Kit, white
(1) 82120 | FP-V pump
(1) 82561 | 1 oz ladle, 10” handle
(1) 82545 | Stainless steel hinged lid
(3) 100515 | Universal Ice Packs
Additional Accessories Include:
(1) 82846 | Topping Can Cooler Kit, Black
(2) 82557 | Deep Fountain Jar, White
(3) 100515 | Universal Ice Packs
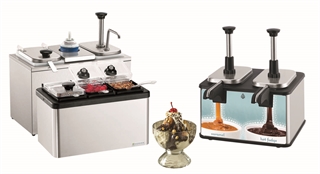
Want the perfect Sundae Funday Station? Invest in this station and an environtmentally friendly, easy-to-clean EZ-Topper™ hot fudge and caramel warmer!